
As it turns out, I'm still forbidden from hitting the pavement as I battle a floating/wandering bone in my feet, instead limiting myself to strengh-training, yoga, and drooling. Thus I also can't permit myself to wander the streets of Augusta with a photo challenge. I can walk, and spend time on my feet, but I can't - in good sense - justify the risk when I don't feel I could outrun the criminals that inhabit Augusta's less savory areas. I must find other activities to occupy my time.
This week, between baking health-conscious muffins for Charlie Company's BK-dietitians/addicts and hunting for a green shirt to force on Matt for tomorrow's family St. Pat's dinner at my parent's house, I entertained myself with a few tutorials in photoshop.
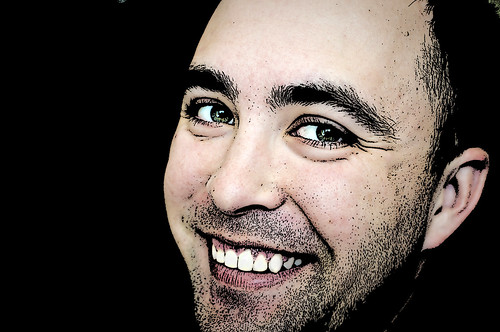
One was an Avatar tutorial, which was in Spanish. And, as it turns out, does not work so well with a non-professional photo. Since I do not have permissions from people to publish altered photos of them, I was left with photos of Matt and myself to play with... which are not professional quality. So... I didn't finish it because the direction it was going in, as you can see, was very... off. Still, I'll link the tutorial I used. A forewarning, though, it requires you to hunt down your own tattoos and avatar eyes. Which I'm pretty sure is copyright infringement, but hey, don't use it for financial gain, and I won't tell, ok?
 |
| Originally, my idea was to black out the back and edit our clothes to look kinda bohemian, but the faces started to freak me out, so I abandoned ship mid-project. |
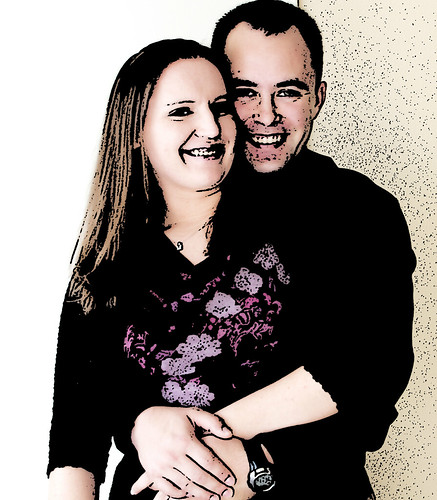
Anyway, what I did enjoy, and I believe turned out quite well, was a cartoon/graphic novel effect I kind of threw together myself. Per the usual way, I created my own technique the same way my mom creates her "recipes:" Take three or four different ways, and twist them together into your own creation. I'll link the tutorials I used below.
1. Start with a high - contrast image. If your image isn't high-contrast (ie: significant light vs. dark), you can doctor it with an Adjustment (using Curves or the Burn/Dodge tool), but it probably still won't look particularly amazing. The computer needs significant contrast to create an outline, much like your autofocus on your camera needs some contrast to set a focal length.

2. Duplicate the layer. (Right-click on the layer and select "Duplicate Layer" from the drop-down menu). Make sure the foreground color is black and the background is white. With the top layer selected, go to Filter > Sketch > Stamp. Play with the Light/Dark and Smoothness levels until you get something you're happy with. Click OK or Apply.

3. You should now have a black and white rough outline of your image. With this layer still selected, change the Layer Blend to "Multiply." This will mostly eliminate the white parts so you have a black outline over your digital image. I erased elements I thought took away from the image, like excessively baggy under eyes or phantom shadows. The finished product looks ok, but not really like somebody drew it.
4. Select the bottom layer (the original digital image). What I usually do when applying filters is make sure I always have the original still available in case I don't like my end product, so duplicate the layer again an rename the bottom-most layer "Original." Click the eye next to it so it becomes hidden and out of the way. Select the unnamed layer, rename it "Palette Knife" and go to Filter>Artistic>Palette Knife. Play with the settings until you get something you like. I'd suggest enabling the Preview so you can see it behind your black outline. Click OK/Apply.
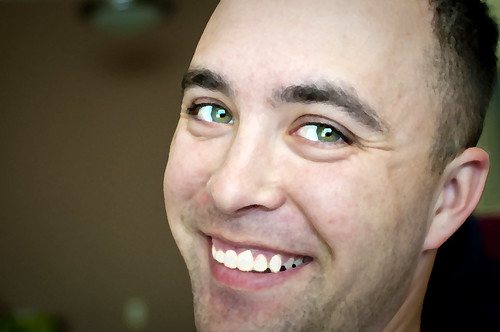 |
| Pay attention to what kind of detail you want to carry over in your effect. I'm paying attention to Matt's eyebrows and the color intensity/ brightness of his eyes. |
I did this with a few different images, trying it with both Palette Knife and Paint Daubs effects to see which was more appropriate. I found Paint Daubs left more detail in the textures, where Palette Knife put more vibrant color in, so I think it just depends on what image you're working as to which effect you want to use. (Surprisingly, Watercolor just looked like a mess, which was the first effect I tried.)
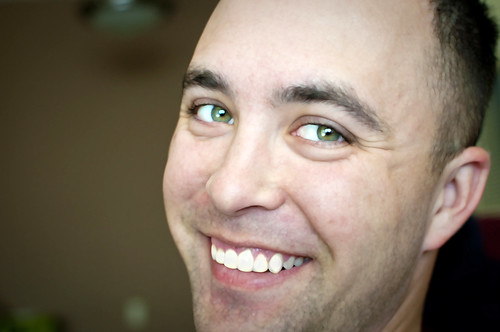 |
| For this particular image, all the detail Paint Daubs effect gives me is held up with the stamp, so I ended up using the Palette Knife in my finished image. |
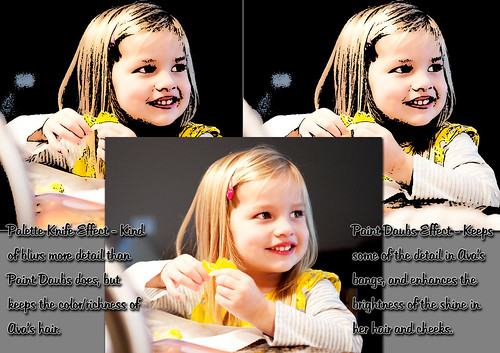 |
| In all of the images I played with, I made several effect layers to test Palette vs Paint. The layer that held the detail I wanted is the one I kept. |
5. Voila! Easy, quick, cartoonized graphic-novel effect.

Check it out: (Sources)
Avatar Tutorial - It's in Spanish. Why I chose to follow the one in Spanish is still a mystery, but I do think I'll end up trying it again when I get some good shots of people and get permissions to transform them into a fictional alien creature.... with my own twists/shortcuts, of course.
Cartoon Technique #1 - TechGuyTales, Youtube.com - This was the foundation of my technique. This guy goes into some intense color-over detail, but I wasn't particularly that patient at the time.*
Cartoon Technique #2 - PhotoShopDudes, Youtube.com - If you have the patience to stick with this guy through his oopsies, by all means. I can't blame him, but this is exactly why I don't make video tutorials. Joking smiley face.*
*Both of these tutorials use vaguely similar techniques, hand coloring in with paintbrush. Which I find to be a complete waste of time. If I wanted block color, I would use the Pen tool and create a Clipping Mask. Alas, Photoshop is a miracle time-saver and can do the coloring for you. So... why waste the time?
Cartoon Technique #3 - via Illustrator - Jesse Hora Dot Com via VectorTuts.com - This is the old, traditional way I have done cartoons in the past, it's more free-form, hand-drawn computer-style... if you like hyphens. I used this technique in my Senior Portfolio, and it turned out pretty well. This guy is a lot better.
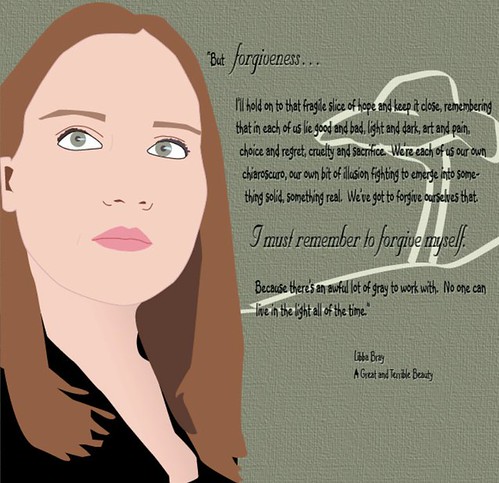 |
| Self-portrait circa 2011 for my Senior Portfolio (Free-hand with photo reference in Illustrator), with one of my favorite quotes from my favorite book in high school. |
No comments:
Post a Comment